- Navigate to the Allocation Plan List page in Departments - LS Retail - Replenishment - Manual.
- Open an existing Allocation Plan Defined, or create a new one. For more information refer to How to: Create an Allocation Plan Defined.
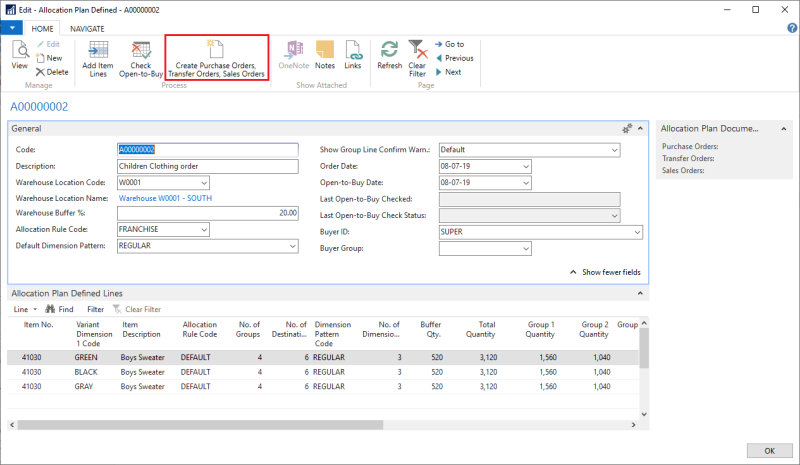
- Create Allocation Plan Defined Lines manually, or click Add Item Lines on the Home action menu.
- Change the quantities to allocate as needed. For more information refer to How to: Adjust Quantities in the Allocation Plan Defined.
- Click Create Purchase Orders, Transfer Orders, Sales Orders on the Home action menu.
- Confirm the question in the dialog box:
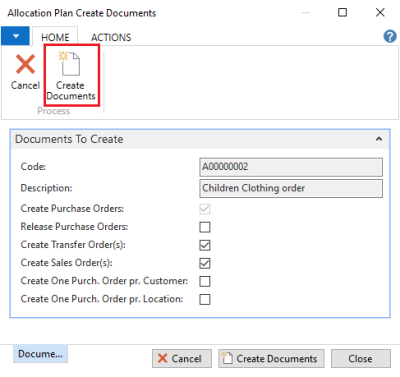
- Select the applicable options. Finalize the document creation by clicking Create Documents on the Home action menu:
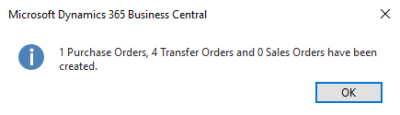
- The system informs how many documents were created:

Note: The number of created document lines can be seen in the fields No. of PO Lines Created, No. of TO Lines Created, and No. of SO Lines Created. This information is also displayed in the Allocation Plan Documents FactBox.
To access the created documents
- Navigate to the Allocation Plan List page in Departments - LS Retail - Replenishment - Manual.
- Open an existing Allocation Plan Defined with documents created.
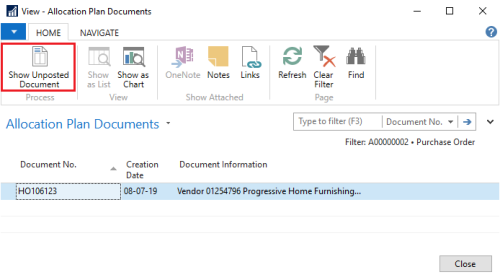
- In the Allocation Plan Documents FactBox, click the number which represents the created documents.
- Alternatively, select the fields No. of PO Lines Created, No. of TO Lines Created, or No. of SO Lines Created in the Allocation Plan Defined Lines, and click the number to drill down to the documents.
- Click Show Unposted Document on the Home action menu in the pop-up page to open the respective document:

To delete and recreate documents
- Navigate to the Allocation Plan List page in Departments - LS Retail - Replenishment - Manual.
- Open an existing Allocation Plan Defined with documents created:
- Select the Allocation Plan Documents FactBox, and click the number which represents the created documents.
- Alternatively, select the fields No. of PO Lines Created, No. of TO Lines Created, or No. of SO Lines Created in the Allocation Plan Defined Lines, and click the number to drill down to the documents.
- Click Show Unposted Document on the Home action menu in the pop-up page to open a document:
- Delete the document in the respective document's page.
- Repeat steps 3 to 6 as needed.
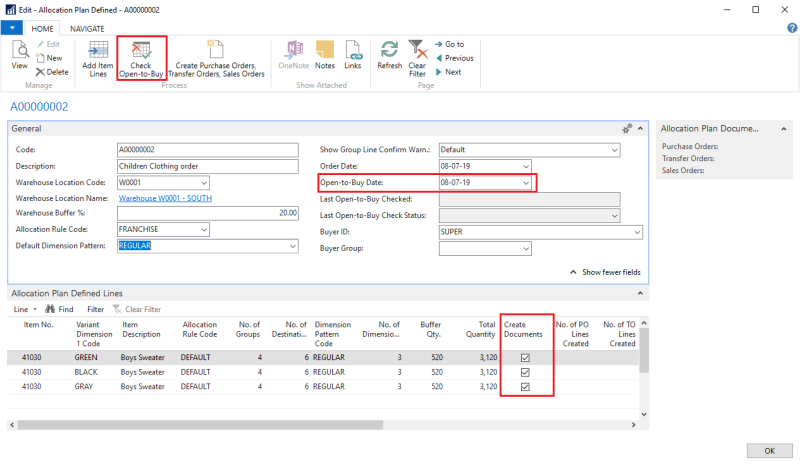
- Select the Create Documents check box in the Allocation Plan Defined Lines for the item that you want to recreate documents for:
- Change the quantities to allocate as needed. For more information refer to How to: Adjust Quantities in the Allocation Plan Defined.
- Click Create Purchase Orders, Transfer Orders, Sales Orders on the Home action menu.

To perform Open-to-Buy checks
- Navigate to the Allocation Plan List page in Departments - LS Retail - Replenishment - Manual.
- Open an existing Allocation Plan Defined that is ready for Purchase Order Creation.
- Fill in the Open-to-Buy Date. This date will be used to perform an Open-to-Buy check on this Allocation Plan.
- Click the Check Open-to-Buy action on the Home action menu:
- If the check is successful, the system shows a notificatin message. If the check fails, the system redirects to the Open-to-Buy Log page. For more information on Open-to-Buy checks refer to How to: Perform Open-to-Buy Checks on Allocation Plans .
See Also